Hi, does anyone have advice on what tools I will need for making moulding from scratch and also what I will require for making deep box frames?
If you were setting up a workshop what saws etc could you not live without - morso excluded, more table saws, routers and that type of thing i have in mind.
Workshop Tools


Re: Workshop Tools
You can make a good selection of mouldings with a table saw, router table and maybe a planer/thicknesser.
These can be had fairly cheaply and don't occupy a huge amount of space. The entry-level machines may be
OK according to the amount you use them. Basically you get what you pay for.
There are limits though. If you want to do big scoops or any sections that involve removing large amounts of timber then
you really need a profiling machine which would be a seriously industrial piece of kit. Not cheap.
Watch Out. There's A Humphrey About
-
Framemaker Richard
- Posts: 254
- Joined: Wed 02 Jul, 2014 5:06 pm
- Location: Worcestershire
- Organisation: framemaker
- Interests: Antique frames
Re: Workshop Tools
I think it also depends on quantity of moulding you plan to make and what type profiles, also how much room you have. If I was setting this up (and I did have plans to do so a few years ago, before my business went in another direction) I would get a good solid spindle moulder with power feed, table saw, planer/thicknesser, hoffman dovetail router, biscuit joiner, decent mitre chop saw. If space was limited then a combination machine would combine the table saw/spindle/thicknesser.
-
Not your average framer
- Posts: 11008
- Joined: Sat 25 Mar, 2006 8:40 pm
- Location: Devon, U.K.
- Organisation: The Dartmoor Gallery
- Interests: Lost causes, saving and restoring old things, learning something every day
- Location: Glorious Devon
Re: Workshop Tools
I think you have to be realistic about the limited capabilities of a router, it is fine for a small level of work, but as soon as you consider production quantities, you have to realise that you will be getting through router bits at an unrealistic rate and that a spindle moulder becomes the sensible option. Your spindle moulder blades can be resharpened as the need arises, but there can be expenses to be taken into account when this becomes necessary.
There is quite a lot more to this than you might be thinking. Sourcing suitable wood at a reasonable price may be a question of the quantities you are prepared to buy and then there are storage and wastage issues to consider. I think it might be helpful to work out how much workshop space you will be needing to accomodate the machines, materials, and other ancillery items to see what is involved. A lot of us have routers, table saws and mitre saws, by very few of us are making our own mouldings from scratch.
If you are going to be machining mouldings from scratch then I would suggest that a decent sized bandsaw capable of cutting wood down to size prior to machining moulding profiles is likely to be an important item and I'm not talking about an entry level bandsaw, but one capable of running blades of a decent width and with a motor which has enough power to cut through a reasonable thickness of the hardest woods you intend to be using in a reasonable time. Such a machine is ublikely to cost you any less than £1500 to £2000, if bought as new.
Assuming that the deep rebate mouldings that you are talking about will be a plain rectangular profile, then a planner thicknesser would be a practical way of producing the basic outside profile before machining the rebate. It is a reasonable statement to say that when it comes to planner thicknessers, that you really do get what you pay for and getting something that is too cheap, may be an easy way to waste your money.
Cutting the rebate with something similar to a saw table, fence, feathers and an electric planner could be something well worth considering as a cost effective and practical option. Both the planner thicknesser and the electric planner will make plenty of noise in regular use and will not be popular with the neighbours, if you are planning to operate from a residential location. At the end of the day, I think a basic set up may well be in the region of about £4000 to £5000 and earning a living from that set up as well as seeing a return on that investment is likely to be quite hard work, over a long period of time.
I may not be typical, but I have invested in a reasonable degree of capability in workworking power tools, but I have been much more interested in the capability, than getting into production level machine tool work. I have the capability to undertake jobs that I used to turn away, but that does not mean that I have to take on too much of any particular jobs at all. As always, I will pick and choose what I want to do, but if the need arises then the capability is there.
Mark Lacey
“Life is short. Art long. Opportunity is fleeting. Experience treacherous. Judgement difficult.”
― Geoffrey Chaucer
“Life is short. Art long. Opportunity is fleeting. Experience treacherous. Judgement difficult.”
― Geoffrey Chaucer
Re: Workshop Tools
I got a router table recently. Only a cheapo one but it does it's job. If I were using it more often then a better one
would be easier to use. For intensive use a powerful router with a half-inch shank would be the thing. I mostly use
the router to modify existing sections - Cutting a cove or chamfer into back of a flat moulding for example.
I recently did about 300ft of a simple L moulding using sonme quite rough old wood from Wickes. It wasn't brilliant
but it didn't matter in this case as the profile is for a bridge piece between two stacked mouldings and as such is not visible.
Cutting rebates on a router can be a bit long-winded as it sometimes needs 2-3 passes to remove all the waste. It's quicker on
a table saw, but you have to remove the guards and the parting knife and make some guides to keep the work from wandering.
As for wood, it's expensive in small quantities and the stuff you can but readily from the usual suppliers tends to be a bit iffy.
A better source would be reclaimed stuff from old furniture and such. Of course this is not going to yield big quantities of wood,
but the quality is likely to be far superior. I am at the moment trying to make a frame from a plank of wood that has been leaning
against my fence for 20+ years. It's very rotten but that's the effect I want. The hot weather has nicely dried it out. I hope to
get it into a state whereby it's stable enough to serve. It came out of the old house next door and must be 200 years old. I'm going to
post pics of the project later......
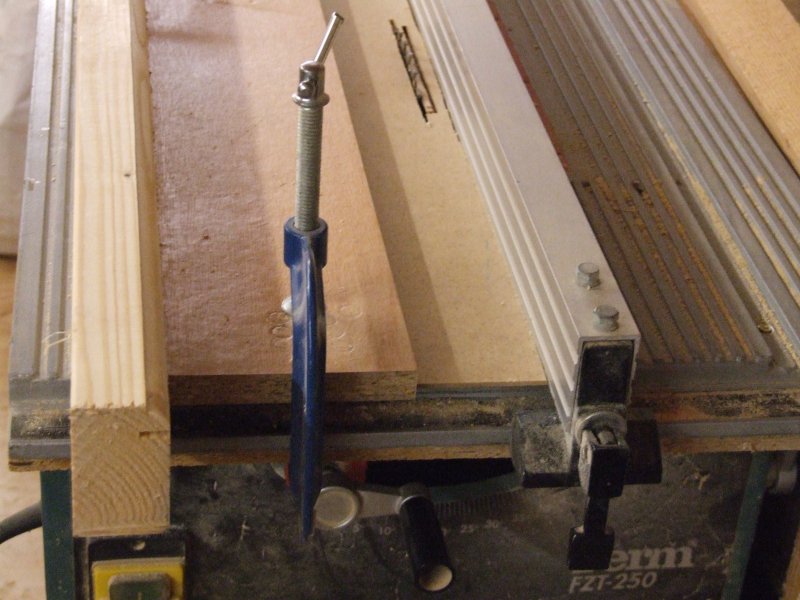
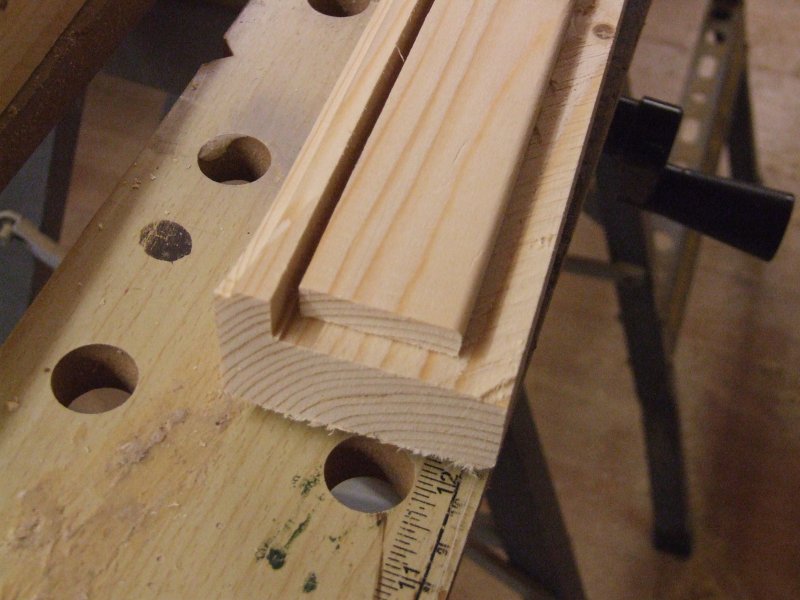
FWIW this is my one-and-only moulding that I made from scratch. A bit of sawn 2x2 with a roundover and a rabate cut in. It was
intended as a driftwood finish so rougher the better. The rebate was quite wide and the bit sawn out made a good spacer.

would be easier to use. For intensive use a powerful router with a half-inch shank would be the thing. I mostly use
the router to modify existing sections - Cutting a cove or chamfer into back of a flat moulding for example.
I recently did about 300ft of a simple L moulding using sonme quite rough old wood from Wickes. It wasn't brilliant
but it didn't matter in this case as the profile is for a bridge piece between two stacked mouldings and as such is not visible.
Cutting rebates on a router can be a bit long-winded as it sometimes needs 2-3 passes to remove all the waste. It's quicker on
a table saw, but you have to remove the guards and the parting knife and make some guides to keep the work from wandering.
As for wood, it's expensive in small quantities and the stuff you can but readily from the usual suppliers tends to be a bit iffy.
A better source would be reclaimed stuff from old furniture and such. Of course this is not going to yield big quantities of wood,
but the quality is likely to be far superior. I am at the moment trying to make a frame from a plank of wood that has been leaning
against my fence for 20+ years. It's very rotten but that's the effect I want. The hot weather has nicely dried it out.
get it into a state whereby it's stable enough to serve. It came out of the old house next door and must be 200 years old. I'm going to
post pics of the project later......
FWIW this is my one-and-only moulding that I made from scratch. A bit of sawn 2x2 with a roundover and a rabate cut in. It was
intended as a driftwood finish so rougher the better. The rebate was quite wide and the bit sawn out made a good spacer.
Watch Out. There's A Humphrey About
-
A3DFramer
- Posts: 200
- Joined: Fri 18 May, 2012 6:51 pm
- Location: Shropshire
- Organisation: Collectors Cases
- Interests: Virtual 3D Model making, Digital Graphics.
- Location: Shropshire
Re: Workshop Tools
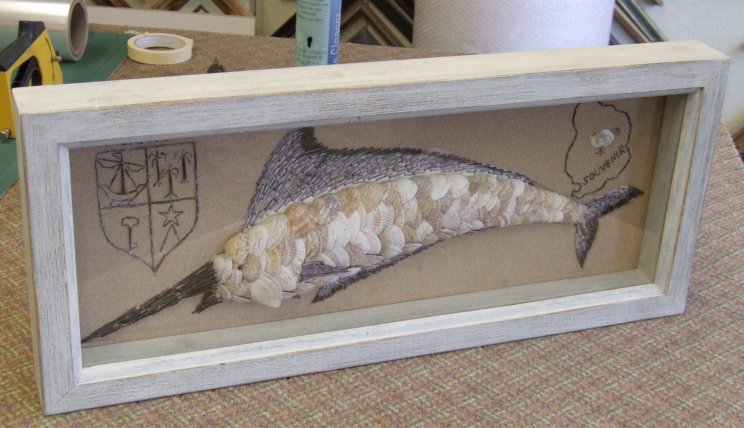
During the 1980-90 my company many thousand deep boxes of varying depths for pub decor. We would rip down 8x4 sheets into 8ft strips of 2",3" or 4" depths, mitre & underpin into appropriate size boxes, for the front edge of the case we had a variety of mouldings many 'off the shelf' in the DIY trade. This was glued and pinned to the box frame with a fine needle gun. Side slips of the sort shown in Prospero's last picture were 1/4" MDF, ripped down from 8x4 sheets. These strips were either painted or fabric covered to match the backboards of the displays.
Plain MDF could be used for paint finish outers, veneer boards were used for stain and varnish finishes.
So all we needed was a saw bench capable of ripping down 8x4 sheets and a very fine nail gun, which I believe are very much more available today than when I had to find such a tool.
In later years we had some emafil profiles manufactured for us, this at the request of a particular wholesaler, but the limitations of these were depth. When creating displays out of a variety of artifacts a matter of a small amount of distance can be quite limiting. This became apparent when a manufacture came up with pressed plastic bubbles for oval frames, the curvature was very restrictive for display layout, so even if the assembly looked attractive the display was often out of proportion artistically and for the price margin it would be expected to fit in.
My companies signature line was a glass cover, set in a frame. This approach has been considered an irrelevance by many today, but it was the ultimate goal of many Victorian and Edwardian craftsmen, who might be considered 3 dimensional framers. For those considering display work, I would advise a reversal of this attitude, as the depth achieved by glass/transparent sides can give increased versatility to the concept of 3D framing.
-
mbaister
- Posts: 30
- Joined: Sun 14 Jan, 2018 10:44 am
- Location: Glasgow
- Organisation: Martin Baister
- Interests: oil painting, photography, framing
Re: Workshop Tools
Thanks to everyone for such in depth information! Really helpful to see different points of view. Seems to make sense starting small and building up as I go instead of jumping into anything too expensive before I know I’ll really get a good return on it.